How To Make Your Own Sourdough
With this guide, making your own sourdough is easier than ever!
With this guide, making your own sourdough is easier than ever!
While you might need to set aside some time for a sourdough recipe, trust us when we say it's totally worth it! With these simple step-by-step instructions, you'll become a pro in no time!
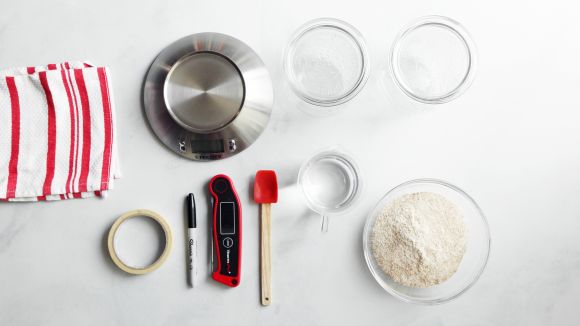
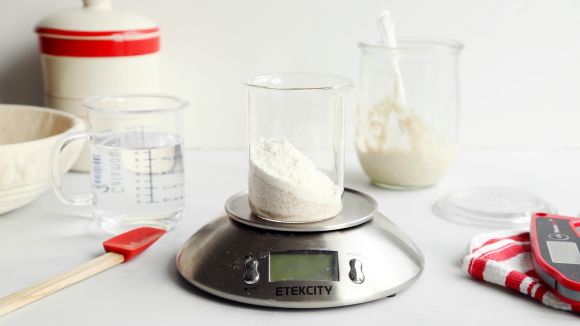
To begin the base of your starter, you'll need 100 grams whole wheat flour and 125 grams water. You’ll need two wide-mouth 1 quart Weck jars or Mason jars for this process. The first step is to weigh each jar (without the lid) and write that number on the bottom or somewhere else handy. This will be useful when we go to do the feedings each day.
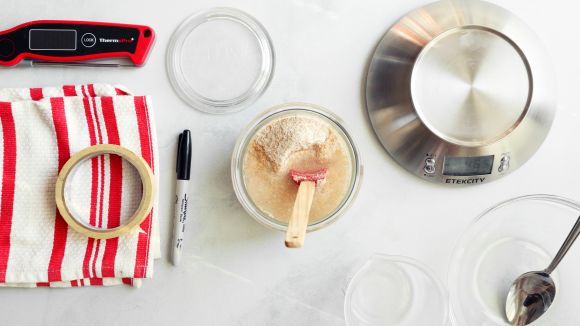
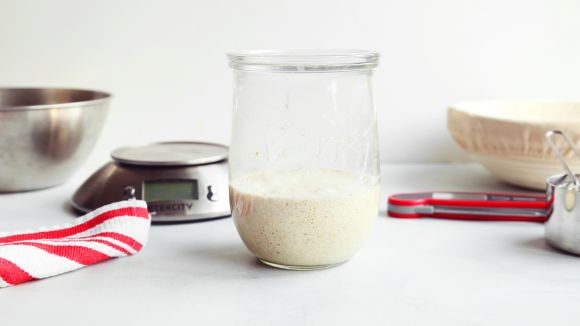
In the morning, combine 100 grams whole wheat flour or whole grain rye flour with 125 grams water in one of the jars, with a small rubber spatula until well combined. You want the water to be around 80°F. Place the lid on (without the rubber insert or the clips) and keep in a warm spot. Let the mixture rest for 24 hours.
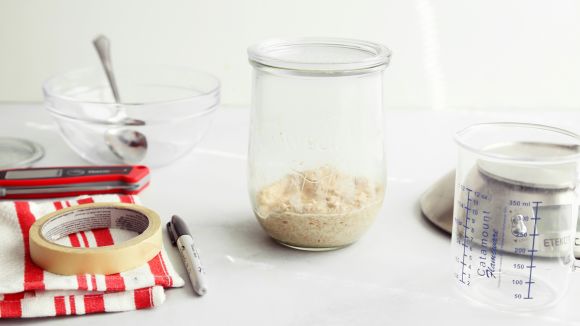
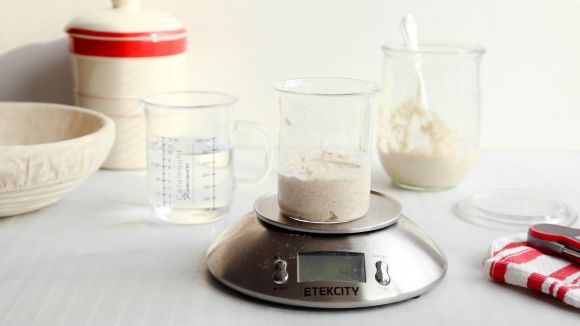
In the morning, place the second, empty jar on the scale and tare to 0 grams. Add in 75 grams of the starter mixture from the day before and discard the rest. Then add in 50 grams whole wheat or rye flour, 50 grams all-purpose flour and 115 grams warm (80°F) water. Mix well with a small rubber spatula, place the lid on and keep in the same warm spot for another 24 hours. Clean out the first jar and set aside for the next day.
This is the first day that you’ll be doing two feedings — one in the morning and one at night. In the morning, place a clean jar on your scale and tare to 0. Add in 75 grams of the starter from the day before and discard the rest. Then add in 50 grams whole wheat or rye flour, 50 grams all-purpose flour and 115 grams warm (80°F) water. Mix well with a small rubber spatula, place the lid on and let it rest for 12 hours. Before bed you can proceed with the second feeding of the day. At this point you can begin using only one jar. Discard down the contents to 75 grams of starter, then add in 50 grams whole wheat or rye flour, 50 grams all-purpose flour and 115 grams warm (80°F) water. Mix well with a small rubber spatula, place the lid on and let rest overnight.
On the morning of the 7th day, discard down the contents of the jar to 50 grams, then add in 50 grams whole wheat or rye flour, 50 grams all-purpose flour and 100 grams warm (80°F) water. Mix well with a small rubber spatula, place the lid on and let rest for 12 hours. In the evening, repeat the same process with the same measurements. At this point, your starter should be rising and falling each day predictably. You can start using your starter at this point. Continue to feed it everyday twice a day as long as you’re planning to make bread.
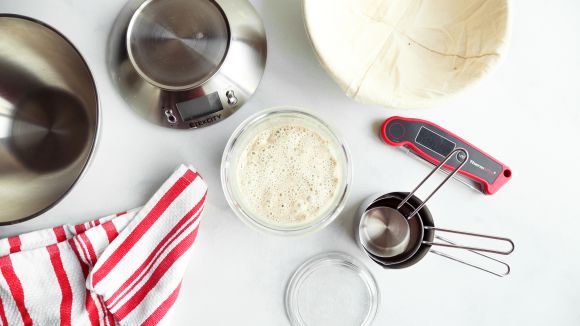
9:00 AM the day before, begin by combining 25 grams mature starter, 25 grams whole wheat flour, 25 grams bread flour and 50 grams water at 80°F in a mason jar until well combined. Cover loosely with plastic wrap and store in a warm spot until it doubles in size — about 5 hours.
12:00 PM the day before, combine the bread flour, spelt flour and 350 grams of water. Use your hands to squeeze the flour into the water until all of the flour has been hydrated. At this point, we’re not looking for a smooth dough at all. Cover loosely with plastic wrap and let it rest alongside the levain.
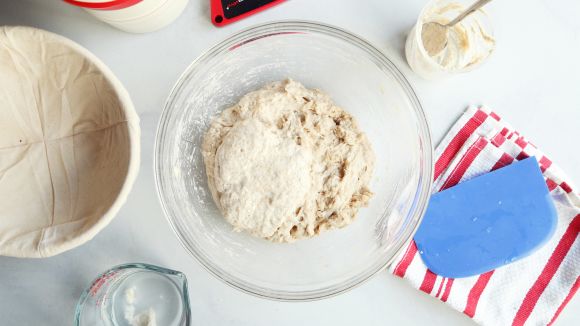
2:00 PM the day before, your levain should be doubled in size and ready to go. Measure out 100 grams of that mixture and add it to the autolyse. Use your hands to incorporate the two mixtures together by poking your fingers through the dough. You can start filing the dough onto itself until it becomes uniform. Let it rest for 15 minutes, then sprinkle in the salt and pour the remaining 25 grams of water on top. Fold the dough onto itself until it comes together. Cover loosely with plastic wrap and allow to rest in a warm spot until doubled in size, about 4 to 5 hours. Every 30 minutes, uncover the dough and go into one side, pulling and stretching it up and over onto itself. Do this a few times, rotating the dough each time. Cover, return to rest and repeat 4 to 5 more times.
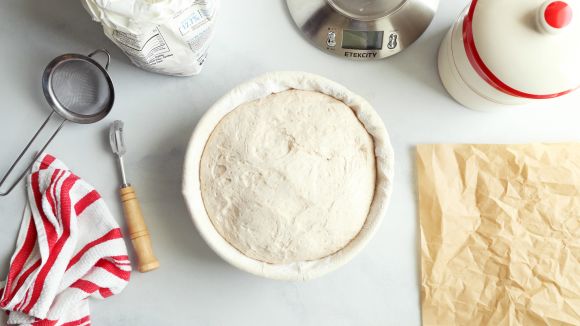
7:00 PM the day before, carefully transfer the dough onto a lightly floured work surface. Fold the dough onto itself from top to bottom and then side to side. Cover loosely and rest for 20 minutes. Flip the dough over and then shape it into a round, smooth ball as best as you can. Dust a proofing basket or large round bowl lined with a clean kitchen towel with rice flour. Transfer the dough into the prepared basket or bowl, smooth side down. Cover loosely with plastic wrap and chill in the fridge overnight.
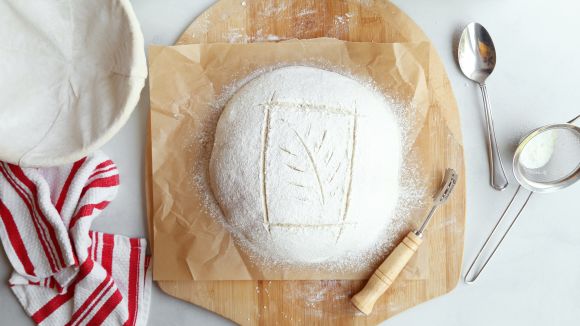
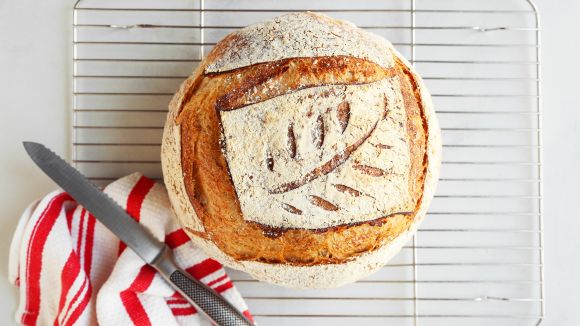
8:30 AM the morning of, place a 5 qt or larger Dutch oven with a lid in the oven and preheat to 450°F for 1 hour. Once the hour has passed, remove the dough from the fridge. Cover with a small piece of parchment paper and place a pizza peel or cutting board on top. Flip it over and then remove the bowl from the top. Dust the top of the bread with a thin layer of bread flour. Use a sharp bread lame or sharp pairing knife to cut a design on top.
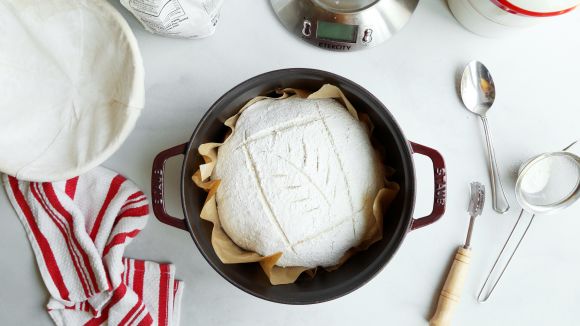
Using heavy duty oven mitts, carefully remove the pot from the oven and uncover. Use the parchment paper to carefully transfer the bread (along with the paper) to the hot pot. Cover and bake for 20 minutes. Uncover and bake for another 30 minutes until deep golden brown and the internal temperature of the bread is 208°F.
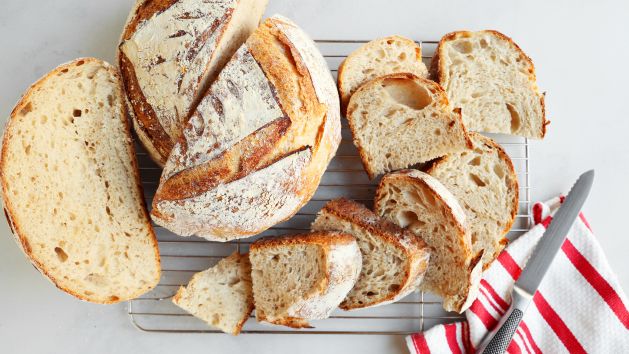
Remove the pot from the oven and carefully lift the bread out of the pot, using the parchment paper to grab it. Place on a wire rack and allow to rest for 1 hour before cutting and enjoying.